Search in Selfpackaging

Showing posts with label tutorial. Show all posts

23 Oct 2013

Tutorial: original gift box


We can’t wait any longer! We want to introduce our latest design! A new gift box!
All the orders placed between Oct. 23rd and 29th, will receive a bonus gift! Five units of our new gift box! It's not even in our catalogue yet, but it will be added soon. What do you think??


While we are preparing the assembly video, here is a tutorial to show you how to make it! It's easy!
   
First of all, this is what you will receive (no double-sided adhesive tape required for the assembly):

- 5 elongated pieces in turquoise
- 5 elongated pieces in fuchsia


It's so easy! You just need to insert into each other, as shown, alternating the colours:


Repeat the procedure successively, a fuchsia piece, then a turquoise one, until we have this nice peacock tail

Once all the pieces are put together in place for one of the sides, we turn the ‘fan’


Next, we start fitting the other sides to each other, starting from the right-hand one and placing each one after the other, as shown, always from the bottom:


Keep going on with the process, piece by piece:


And our gift box is ready! A tidy little surprise to delight everybody… Ta-dah!

8 Oct 2013

Are you ready for Halloween?


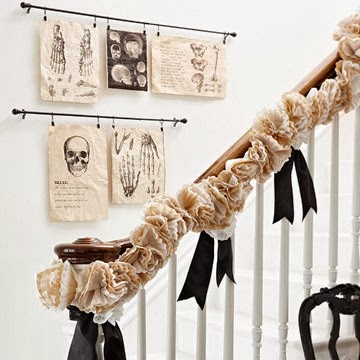
Halloween atmosphere has just landed in our studio. Some pumpkins, spider webs and wicked witch laughs are surrounding us. That’s why we have decided to get down to work to create some Halloween tutorials. But first things first, we need some inspiration before designing. Here some useful ideas to decorate your home on Halloween.


blog: Parents


29 Mar 2013

EASTER EGGS TUTORIAL

Painting Easter eggs won’t be complicated anymore. In this post will give you some tips to obtain a brilliant result.


White eggs
White vinegar
Natural hemp cord
Food colorants
Paper towel
Recipients to dye each egg separately
A spoon
Black marker
A washi tape roll
Scissors

 
Firstly, we fill the recipients –we took plastic glasses- with water and we will add in them some food colourant drops.
Add few drops of white vinegar, which we’ll sit the colour easily on the eggs’ shell..


And with the spoon’s help, immerse an egg in each recipient.


Let the eggs settle 10 minutes’ time inside the food colourant.


Then, let the eggs dry outside the recipient. If it is so sunny as today… 3 minutes is enough


Et voilĂ ! On the coloured shell we write and draw what we want with a marker, surround the egg by hemp cord and we can make a washi tape flag hanging on it


Everything is ready, you can give our cupcake box with transparent lid as a present and… hide the eggs in the garden or inside your home. They will have a great time try to find them! ;)


You might also like...